
April 18, 2024
24 mins read
24 mins read


Each month we will ask a Product Specialist at Exactal what their favourite feature of RIB CostX is, and how it can be used. This month, we are speaking to our London-based Product Specialist Milan Parmar.
In the AEC industry, it is common for a designer/engineer to make changes to existing drawings. The struggle to compare these drawings to each other is apparent, and quantity surveyors in particular find it difficult to see how a drawing might have changed from the previous revision.
An example that I’ve personally experienced in my previous company was sellotaping an A1 drawing of the old revision to a large window in the office where the sunlight was prominent and affixing the new revision on top to identify any obvious changes. I later found out that only one door and one partition had been removed! I thought to myself, ‘There must be an easier way to do this!’
Hallelujah! RIB CostX provides 3 ways to compare drawings together which all work in different ways so I have more than one option if a particular comparison method isn’t showing the changes as well as another. So what are the 3 comparison methods and how do they work?
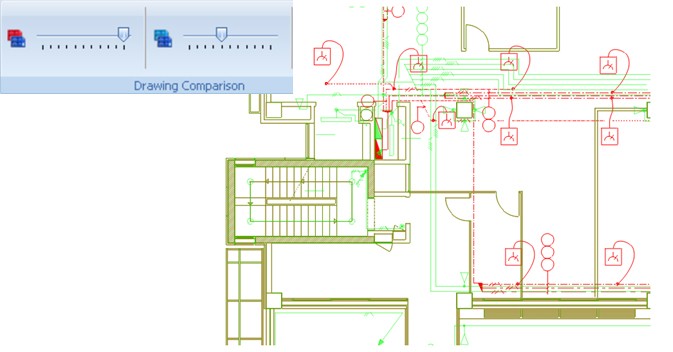
This is the simplest way to compare drawings in CostX®. Two drawings are loaded, with the currently selected drawing appearing in green and the drawing it is being compared to appearing in red. If the drawings are misaligned, the green drawing can be dragged to the required position. The lines that are matching will be shown in brown (combination of red & green). It is also possible to use the sliders shown below to adjust the brightness of each drawing to help further identify differences.
The next two comparison methods are only available after a revision has been added.
This comparison method loads the currently selected drawing and compares the individual line segments (lines, blocks, arcs etc.) to the previous revision of the selected drawing. This comparison method is used to compare PDFs & CAD files. When in Comparison Mode under the layers tab, I can select 3 distinct options of Deleted, New & Same to visualize what each coloured line represents. I’m able to select and toggle the layers until changes become apparent.
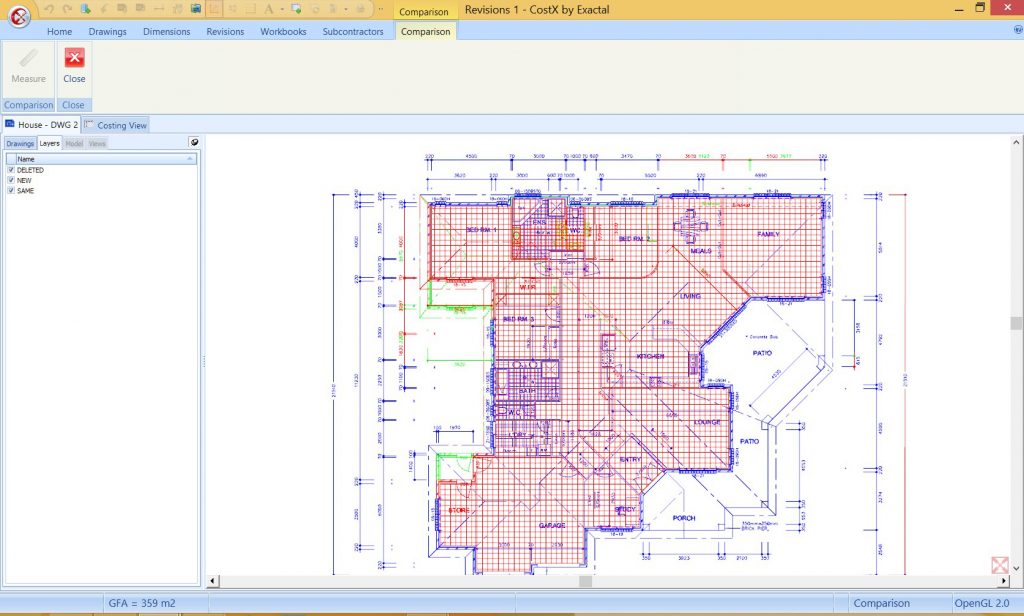
However, if the drawing has been offset by the designer, for example, then no lines will match. There are some other limitations to comparing by lines, but if it doesn’t produce a clear comparison, then try another comparison method.
I would consider this comparison method the most intelligent of the three and it also works for comparing 3D models! Drawing objects contain unique object IDs, so when using the layers in comparison mode, CostX® will recognise if an object has been added, removed, changed or remained the same.
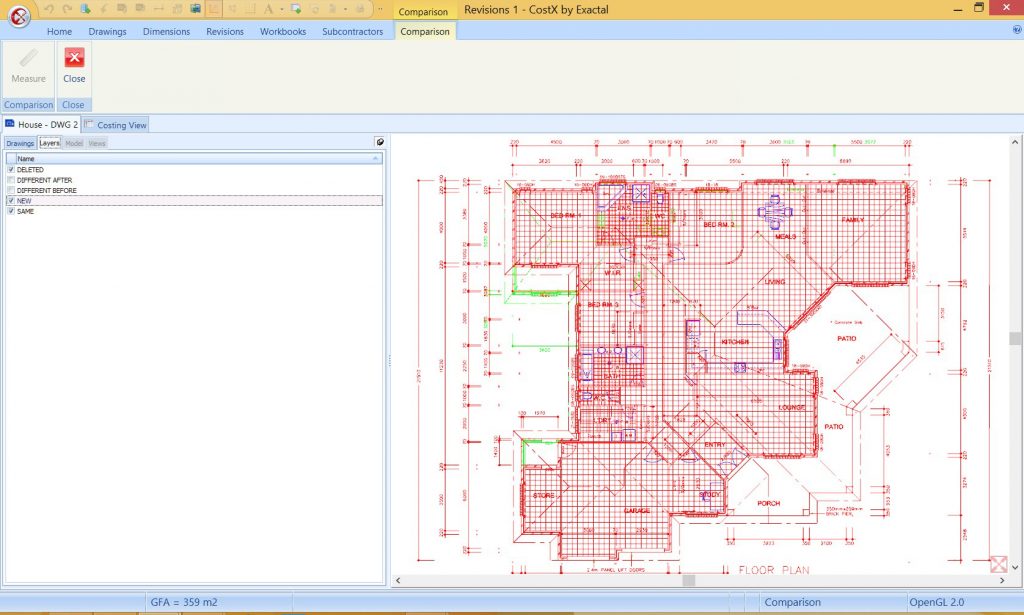
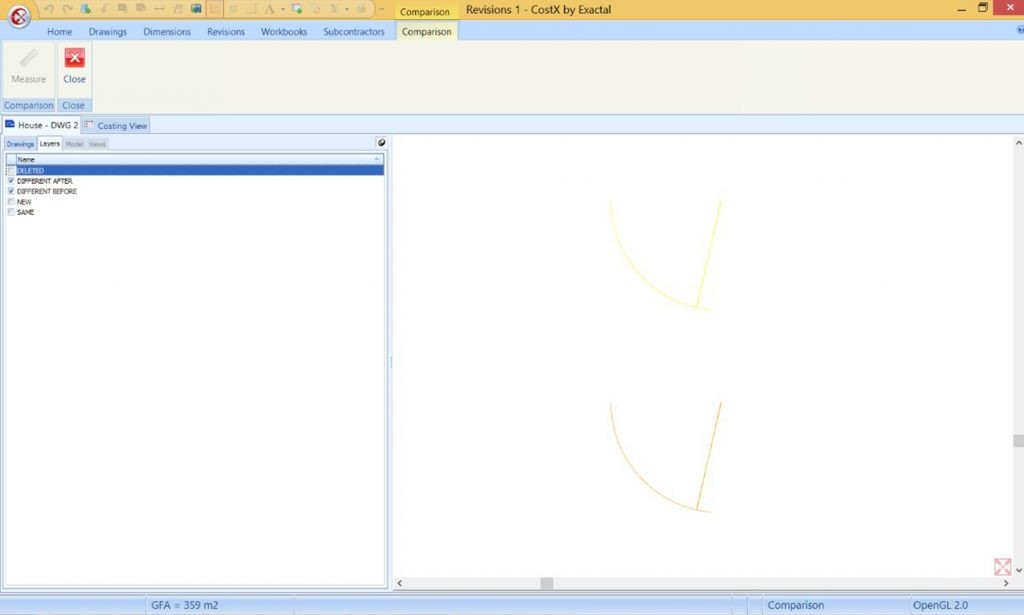
In terms of the changed objects, RIB CostX gives the option to show how they are Different After (the newly placed object) and Different Before (the same object before the revision), so I’m able to toggle between these two layers to interrogate objects that have been rearranged, which can be super useful (see below for an example where a door object has been moved). Also notice how I’m able to zoom in comparison mode; the same applies for panning.
As mentioned, Match Objects is also the best comparison method for comparing 3D BIM models, as they contain unique object IDs where the layers explained above apply in the same way. This is a brilliant way to visualise, interrogate and question the revised model based on objects that have been added, changed or deleted.
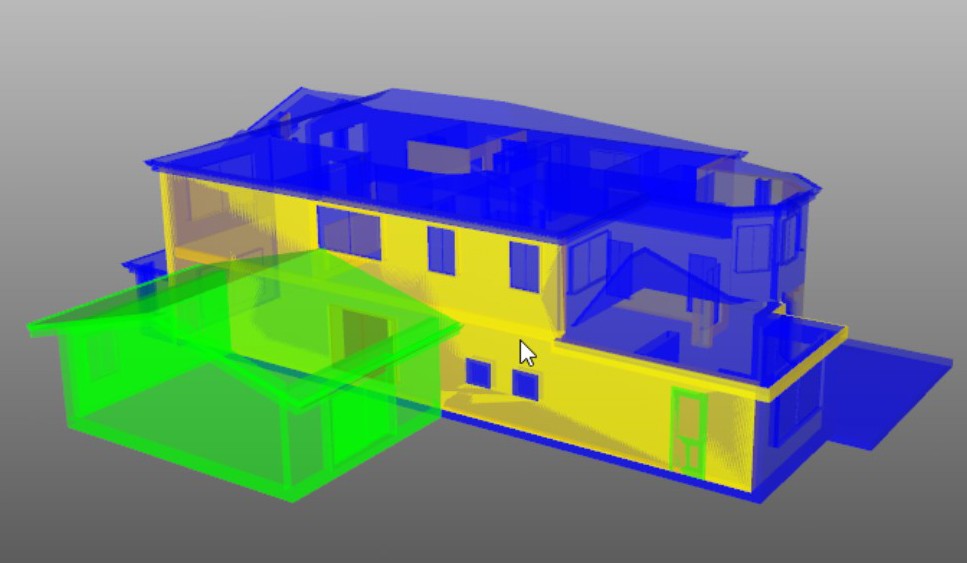
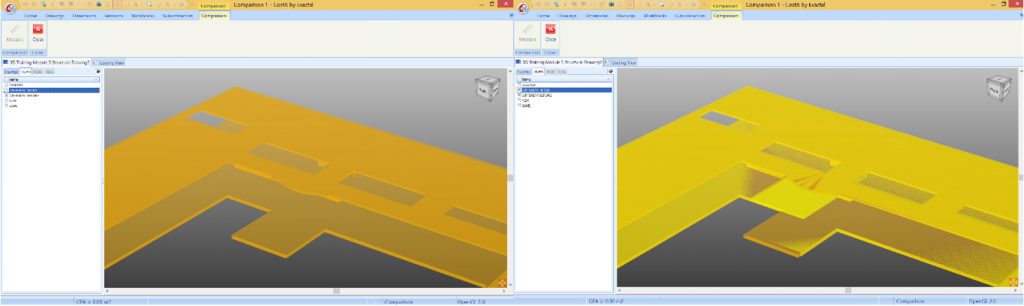
Similar to 2D, I can check how previous objects have been modified by keeping the layer on for ‘Different Before’ and rapidly checking and unchecking the ‘Different After’ box which gives me a good idea where, for example, a window has been moved or where the slab has been modified (the latter shown in the example below). After I compare the drawings and promote the dimensions, I should expect to see a decrease in area for the ground floor slab and an increase in area for the first floor.
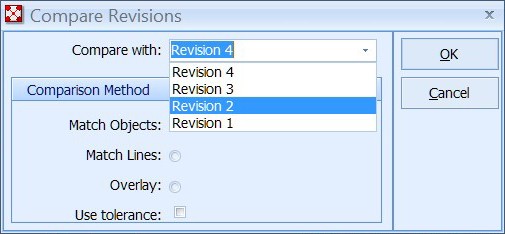
I don’t necessarily have to compare to the last revision, I may compare to any previous revision in the current building using the ‘Compare with’ dropdown, which is great for checking various scenarios if required.
In addition to all this, in RIB CostX 6.5, our latest version, there is a new “Measure” button available while in Comparison Mode. This is a game changer for those wanting to measure variations – for example, adds & omits. This measure button will enable Point Mode, so I can add new dimension groups or just simply measure into previously created ones.

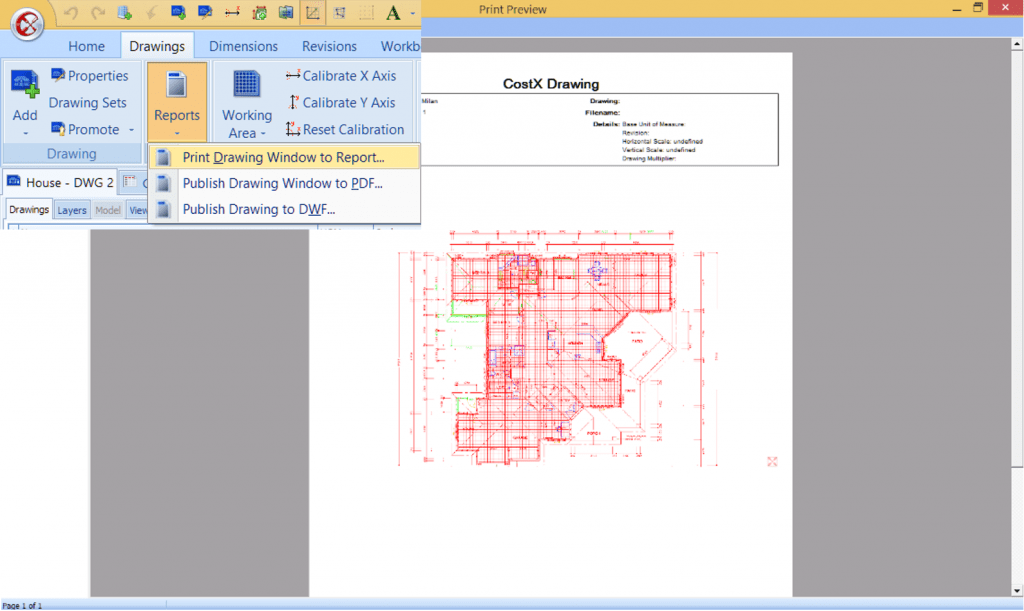
An added bonus to all of this is that any chosen comparison can be printed to report to show differences to the client, designer, contractor, or even just for internal purposes! Simply go to the Drawings tab, then click Reports and select one of the three options available.
Remember to click the Close button once you’re finished comparing drawings and the Comparison tab will disappear from the Ribbon Toolbar.
I hope you can share my delight in paying tribute to the three options to compare drawings with ease; saving me loads of time identifying changes rather than using a window, sunlight and marker pens!
P.S. The comparison mode is just one part of the Revisions process in RIB CostX. After being able to visualise the changes, it’s possible to quickly revise dimensions in both 2D/3D, update my workbook with the new quantities and totals and run reports to show variance in quantity, totals or any other calculated values! For more, check out our Auto-revisioning training video here.

E-BOOK